Thursday, May 28, 2015

About This Robots.txt

SEO (Search Engine Optimization) is the core of blog traffic. Now days Google are updating their system to give better results to their users. So its going hard to hardest to do Search Engine optimization for blog. But some tricks is still working. Custom robots.txt is one of them. You can simply modify your blog’s robots.txt to make your blog more SEO friendly.

Few days’ back I was faced some hassle about custom robots.txt for blogger blog. So I decided to get the best idea from experts. Then I posted few posts on few forums about the topic. The best answer what I get from googleproductforum is; one of Google’s engineer reply me to use this robots.txt for blogger blog. He also told me that he is also using this custom robots.txt in his own blog.

So I decided to use the mentioned custom robots.txt in my blogger blog. And after few days next I notice that  its really giving me the SEO juice. Today in this post I’m gonna share that SEO friendly custom robots.txt for your blogger blog that was recommended by Google.

How To Install All in One SEO Plugin Blogger:
Step 1: Login to your blogger account select Settings from blogger main menu next select Search preferencesfrom sub-settings.

Step 2: After selecting Search preferences click on Custom robots.txt Edit option under Crawlers and indexing.
Crawlers-and-indexing-blogger

Step 3: After clicking on Edit, blogger will give you two options Yes & No. Select Yes. After selecting Yes a new text box will open. Copy and paste the below text in that open box and hit Save changes button.
User-agent: Mediapartners-Google
Disallow: 

User-agent: *
Disallow: /search
Allow: /

Sitemap: http://tutorialsprogram.blogspot.com/feeds/posts/default?orderby=UPDATED


Customization:

Little customization step below to fit the robots.txt on your own blog.

Original: Sitemap: http://tutorialsprogram.blogspot.com/feeds/posts/default?orderby=UPDATED
Customization: Replace the red color marked "http://tutorialsprogram.blogspot.com" with your own blog URL.

Note: Use with caution. Incorrect use of these features can result in your blog being ignored by search engines.

Tuesday, February 3, 2015

how to add Disqus comment box set in blogger blog

The infrastructure of Blogger commenting system is quite neat and sufficient for many, but what would happen if it is must for your comments to connect to your website though some social sites like Facebook, Twitter, Google in order to make a comment. For that, a webmaster have to install too many Plugins or what should I Say extra effort and hard work.


Disqus is a yet another commenting system which is flexible enough to support API integration including Facebook, Twitter, Google, Open URL, and users can even login through their personal Disqus account (where all our conversation is being recorded). Another thing which makes it better, than any other commenting system is its, robust functionalities.

There is an easy way of integrating Disqus in Blogger. We have to just register a new account over Disqus and by Widget integration it will override all the old/previous comments. Thus, Disqus would be installed successfully.


Registering a New Account over Disqus: Perhaps the easiest part of the whole tutorial is to register your new account. Just head to Disqus.com and register a free account for your website. Select “Get this on your Site” and it will open a new registration form just fill it and head to the next step.  (Do not forget to verify your identity though email verification).

After pressing the Continue button, a new window will appear, which will ask you to select a Platform. Just Select "Blogger" from the list and proceed to the next step.

Installing Disqus Widget (Plugin) in Blogger: After selecting "Blogger" as your platform, a new page will be open'd. From here, the tutorial will get a little complex. This installation consists of two steps one to add Widget in Blogger and second to import old comments.

Step#1 Adding Widget: Now on the page there will be two options. Just Select Add "Your Site Name" to my blogger site and a new window will pop'd out which will allow us to install the widget in our blog respectively.

From the list select your blog and press the blue "Add Widget" button. It will successfully install Disqus commenting system in your site.

Step#2 Importing Comments: Now head back to the previous page where we were working previously  Since, we have fished working with the first step so, now head to the second one. In order to import your old comments from previous platform just go to Tools > Import and proceed to the next step.

On reaching Import menu there will be two options, but we have to select "Import comments from Blogger" so that it imports all those comments which are previously published on the site.

After selecting "Import Comments", it will take you to a new page where it will ask for accessing your blog's data. Just give it the permission by pressing "Grant Access" button.

After granting the permission go back to the Import >> Tools Page. Now you will be able to see a new option there i.e. "Choose a blog to import from" which will allow you to import comments from your blog. From the list select a blog to import comments. Once, the blog is selected press the "Import" button.

Congratulations, Disqus is successfully integrated into your Blogger enabled website. All the old comments will be processed one by one and would be available on your site once the Disqus team finishes reviewing it.

Some other delightful perks of using Disqus is that it allows us to generate a decent amount of revenue by showing some advertisements within comments. Some large organizations always prefer it because it not only helps a community to grow but also provides reliability and user satisfaction. All an all, it is a must have comment system.
Look at the video to know better:

Friday, January 30, 2015

How to hide or disable comments on all pages in Blogger blogspot

In Blogger you have easy option to enable or disable comments on all pages. If you don’t want anyone to comment on any of your pages including post pages then here you go.

In your Blogger dashboard go to settings >> posts and comments and you will have overall comment settings for Blogger.


Comment location you will have four options:

Embedded: This is the default option that appears in all your pages. This options sets comment box below the content.

Full page: In each posts this option will sets a link below which says “post a comment”. This link takes visitors to a separate page to make their comments.

Popup window:  In this option user will be making their comments on popup window.

Hide: This is the option that you needed. By enabling this users cannot make comments on any pages. But existing comments still show up.

Also you can set who can comment? And enable comment moderation as well.


Sunday, January 4, 2015

How to Add Facebook Comment Box in Blogger

Facebook comment for your blogger blog container give out since a good quality method to make your site more attractive and support reader to drop comments if they're before now logged in to Facebook. It in addition serve as a basis of traffic as using Facebook comment shares the comment and post page on the visitors viewers Facebook wall. Facebook comment has no SEO value since it’s being displayed in an iframe which Google won't index.


Comments complete with the standard comment box on your site has extra compensation specially if you get many of comment, more keywords you didn't really talk about in the post content but appear in comments make bring more search engine traffic. This is amazing Facebook comment lacks, not including the extra traffic you get from Facebook.

Adding Facebook Comment Box in Blogger Step 1 :

>>  Log in your Facebook account.
>>  Go to Setting option from to right corner.
>>  Click Developer option from below.
>>  Then click Docs button.
>>  Click Social Plugins option.
>>  Then click Comments from bellow right corner.
>>  You can see now 4 boxes like bellow picture.
  • Url to comment on box give your blog Domain Name.
  • Width box give width
  • Number of post 
  • Color Scheme box 


>>  Finally click Get Code button.

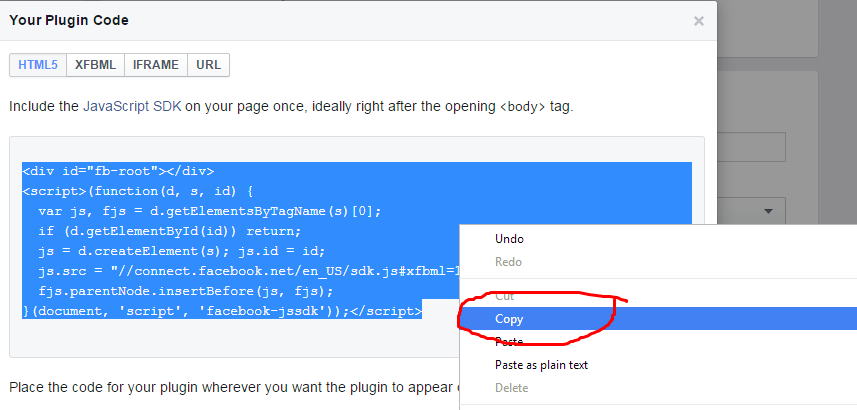
>>  Copy Html5 code from bellow picture.


Note: This is a small fact. After clicking save template, perhaps it say Error message like bellow picture. Now you should a small tricks. Go here And Html5 Coad Convert. Past facebook Html5 code in this box and click Convert. 
And Copy all converted code. 

Adding Facebook Comment Box in Blogger Step 2 :
  1. Log in Blogger dashboard.
  2. Go to template > edit html.
  3. Search </body> tag {Ctrl+f}
  4. Copy the code to the HTML Parse and Now past code above </body> tag.
  5. Click Save Template.
  6. Next search that blog and this red code  <b:include data='post' name='post'/>
  7. Past bellow codes after this red tag.
  8. Copy And past this code:
"
<b:if cond='data:blog.pageType == "item"'>
                 &lt;div
                     class=&quot;fb-comments&quot;
                     data-href=&quot;<data:post.url/>&quot;
                     data-width=&quot;590&quot;
                     data-num-posts=&quot;100&quot;&gt;
                 &lt;/div&gt;
            </b:if>
"


  9.  And Again Click Save Template.

Watch the video tutorials below : 


Thursday, January 1, 2015

Best internet browser

During the largest unexpected defeat in the browser hard work since Microsoft was forced to unyoke Internet Explorer from Windows, Google's Chrome fracture on the scene in 2008, original standard in browser speed, smooth design, and fast iterating software, all the other players to repair their possess lethargic software as they played catch up to the quick beginner. Chrome tired more than a few living as Programming Tutorials Editors Choice, but it's been surpass in speed and features, and it has depressed to a three-way secure for second place as previous favorite Firefox. By way of a wonderfully redesigned line, first-rate performance, careful memory use, helpful browsing tools, and important customization, the independent open-source browser has broken Choice for browsers.


Although Firefox is our favorite browser of the instant, there are motionless other excellent choice that, depending on your priority, will server your Web browsing needs very well, including Internet Explorer, Opera, and Maxthon.  All of the browsers now provide more-than-adequate support for the new HTML5 standard for website coding—even Internet Explorer has been acknowledged by Google as now being among the ranks of "modern" Web browsers. The search kingpin did this when it withdrew its Chrome Frame product, which inserted Chrome's page rendered inside IE.

Tuesday, December 2, 2014

How to Creating an easy calculator in PHP

Let's suppose, we would like to create an easy calculator and without using mysql. It is promising only by using “IF statement in PHP”. First you need to create a new file for writing the codes, and you can use Notepad or notepad++ for this reason, though I’ve used Notepad++ in this tutorial. Presently save the file and name it as “calculator.php”; save the file in the htdocs folder of your XAMPP Installation, because that is our root folder and we run files from that folder on our local server (Local host). Now for creating a calculator you need to first create a form in HTML and add some input tags. Here is the HTML code for the calculator, and we'll later on add PHP code to this:

f(isset($_POST['submit'])){
$value1 = $_POST['value1'];
$value2 = $_POST['value2'];
$action = $_POST['action'];
if($action=="+"){
echo "Your Answer is:
";
echo $value1+$value2;
}
if($action=="-"){
echo "Your Answer is:
";
echo $value1-$value2;
}
if($action=="*"){
echo "Your Answer is:
";
echo $value1*$value2;
}
if($action=="/"){
echo "Your Answer is:
";
echo $value1/$value2;
}
}
?>

Now check your online calculator in your browser, and retain information always open your PHP files using this address: localhost. Every now and then wrongly you directly click on the file which is inside a folder.


I hope you have enjoyed and learnt something new from this tutorial. 

Friday, November 28, 2014

How to Create a new account Paidverts

PaidVerts is an advertising platform that pays you to network with advertisers. Advertisers buy ads in our system then deliver those ads to verified valuable users, and give those users with instant cash incentives to network with the advertiser.

PaidVerts


In view of the fact that PaidVerts have no personality sponsor ADS, it's a come first win circumstances for advertisers and users. You can look ahead to PaidVerts to be more money-making earn plan than other paid to click network. For your information, PaidVerts owns by my traffic Value and you can see real time accounting over here https://www.mytrafficvalue.com/ref/mkhdream


  1. Sign up on Paidverts  Click here. I will pay you 60% referral cash back for lifetime from any ads purchases or clicks as my referral. Please do not join if you're not willing to spend a dime from your pocket because it goanna to take everlastingly to earn money.“You will receive 8 x 50 BAP ads every day. Use your BAP wisely”
  2. Next, click on the Paid Ads sector. Get a note that Paid Ads will eat a little amount of BAP daily. You will receive 8 X 25 BAP ads and Dollar Ads.
  3. As well that, PaidVerts perform offer special range of games for members to earn more BAP in a short amount of time. Games consist of more in making a bet therefore I would not recommend you to try all of them because it's a win-lose state of affairs, your chances of winning was very slim more like 30% vs 70% . The coin Flip technique is no longer working.
  4. As PaidVerts user earn dollars by Accumulating BAP (Bonus Ads Point). On the whole the more Bonus Ad Point (BAP) you will be given more 'higher' dollar value ads in the 'Paid Ads' section. Depends on which BAP group you belongs to.

          The group is those:
·         Group 01: from 100 to 1599 BAP.
·         Group 02: from 1600 to 12000 BAP.
·         Group 03: from 12000 to 24000 BAP.
·         Group 04: from 24k to 48k BAP.
·         Group 05: from 48k to 96k BAP.
·         Group 06: from 96k to 180k BAP.
·         Group 07: from 180k to 360k BAP.
·         Group 08: from 360k to 720k BAP.
·         Group 09: from 720k to 1.5m BAP.
·         Group 10: from 1.5m to 3m BAP.
·         Group 11: from 3m to 6m BAP.
·         Group 12: 6m to 20m BAP.
·         Group 13: 20m BAP and up.


5.       If you have very less ads, you can purchase recycle ads or micro ads from your account. If you            have more than 200,000 BAP I recommend you to purchase ad filter and recycle ads.
       Ad filter block you from getting low value annoying ads.
       Follow the BAP you have to set the ad filter.
       200,000 BAP - $0.10
       400,000 BAP - $0.20
       800,000 BAP - $0.50
       1 million BAP or more - $0.99
6.       Let's keep this simple. The more BAP you have the higher value dollar ads will be issued to you         as each time a dollar ads is issued, the BAP is automatically deducted from your balance!                     Buying ads will give you a boost for more Bonus Ad Point.
      Every-time you purchase $1 ads, you are eligible to advertise your product / page / affiliates link         and receive 3100 BAP instantly! In the other hand each time $1 dollar ads issue to you, only               2000 BAP will be deducted! So you get 1100 BAP profit in total!
7.      Upgrades are not required , though you can upgrade to be eligible to receive more dollar ads               each time someone purchase bulk ads and you will receive 1% of the value.

Video Tutorials in PaidVerts